Introduction
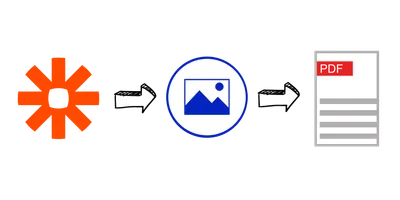
We understand that creating PDFs can be a time-consuming and tedious task, especially if you need to generate multiple PDFs on a regular basis. That's why the integration between Zapier and DocsFold can be a game-changer for your workflow.
With Zapier, you can set up triggers that start the PDF generation process automatically, so you don't have to do it manually. And with DocsFold, you can create PDFs from HTML or Word templates, which means you can customize the design and layout of your PDFs to suit your needs.
This guide will teach you how to automate PDF creation using Zapier and DocsFold.
With our step-by-step guide, you'll be able to create high-quality PDFs in no time, without having to write a single line of code.
Getting started with PDF creation in Zapier and DocsFold
Before we dive into the details, let's take a moment to explain what Zapier and DocsFold are and how they work together.
Zapier is an online automation tool that allows you to connect various apps and services, such as Google Sheets, Slack, and Trello. With Zapier, you can automate repetitive tasks and streamline your workflow.
DocsFold is a cloud-based service that allows you to generate PDF documents from HTML or Word templates. It can be integrated with Zapier or through a REST API
It offers a simple and user-friendly interface, making it easy for non-technical users to create professional-looking PDFs.
Now that we have an understanding of what Zapier and DocsFold are let's proceed to the next steps.
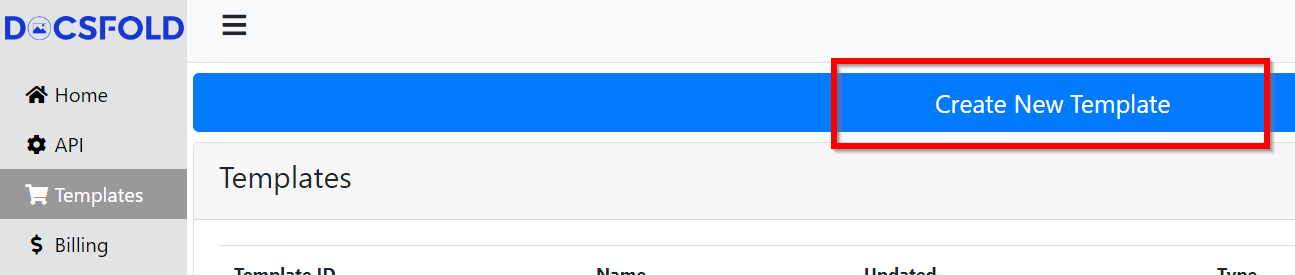
Create a reusable template in DocsFold
Log in to your DocsFold account. If you don't have an account yet, you can create one for free.
Go the Templates section and click on the Create New Template button, or use an existing template, if you already have one created.
If creating a new one, you need to select the template type. In this case, we'll use HTML, but you can also use Word templates if you prefer.
Then, enter the name of your template, select one of the existing base templates and click on the "Create Template" button. We'll go with the Certificate #1 base template for this example.
We will use template properties/variables to place real data in the template. In this case we will replace the $organization, $name and $reason properties with the actual values. For more information on template properties, check out our templating tutorial documentation.
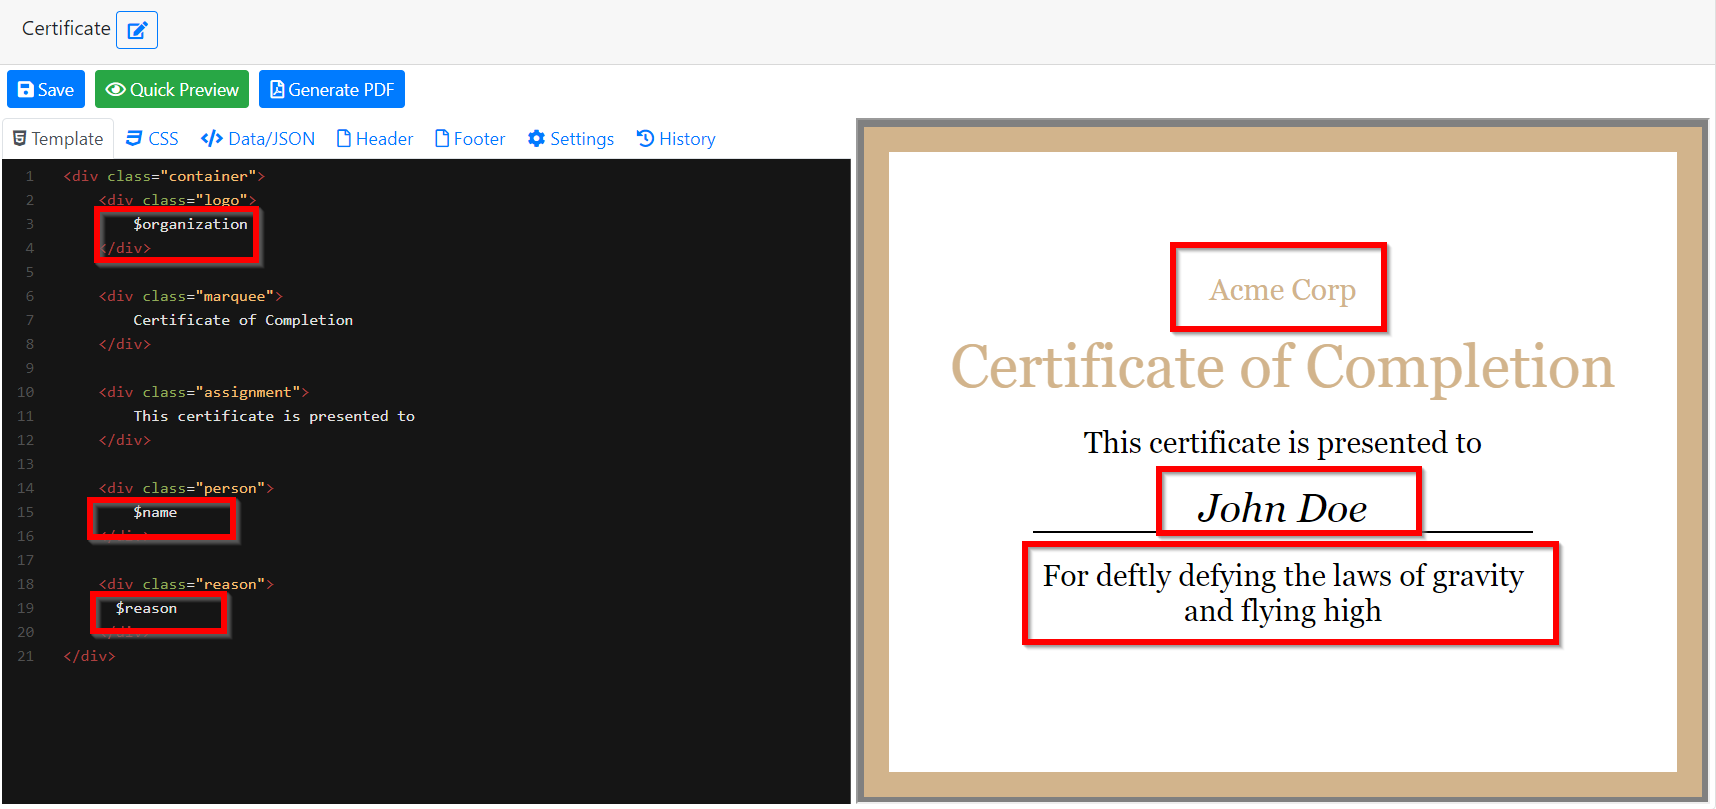
You use replace the template properties with real data on Data/JSON tab and use the Quick Preview button to test.
Set up the Zapier trigger to start the PDF generation process
To get started, you'll need to create a Zap in Zapier. A Zap is a connection between two apps that automate a specific task.
In this case, we'll use Google Sheets as the trigger app, which means that the PDF generation process will start when a new row is added to a Google Sheet.
First, log in to Zapier and click on the "Make a Zap", or "+ Create Zap" button.
Next, select "Google Sheets" as the trigger app and Trigger "New Spreadsheet Row".
Connect your Google Sheets account to Zapier and select the spreadsheet and worksheet you want to use.
Select Event "New Spreadsheet Row" and click on the "Continue" button.
Once connected to Google Sheets, you'll need to select the Spreadsheet and the Worksheet where you have your data and click "Continue".
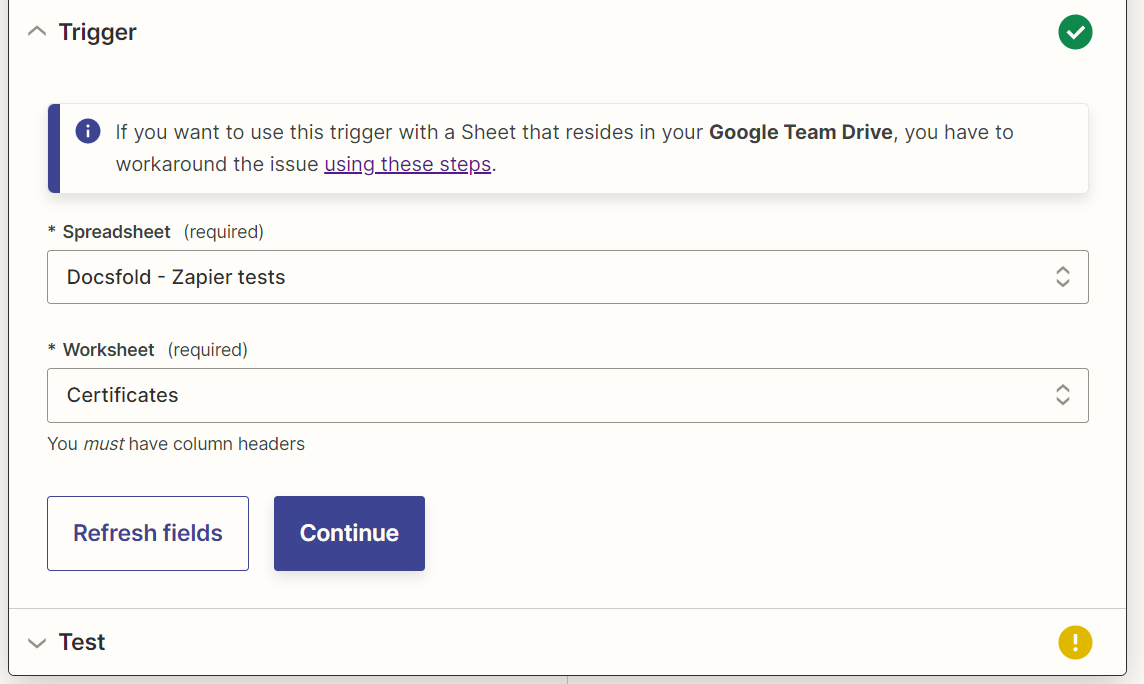
Test the trigger to make sure Zapier is able to find a record, then continue.
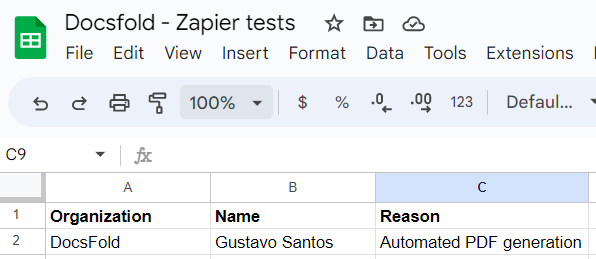
In our case, we'll use the Organization, Name, and Reason columns we have in our sample sheet.
Finally, select the columns you want to use as template properties. In this case, we'll use the Organization, Name, and Reason columns we have in our sample sheet.
Set up the DocsFold Generate PDF action
Once you've set up the trigger, you'll need to set up the action that generates the PDF using DocsFold.
To do this, select DocsFold as the action app and Generate PDF as the action event.
Then, connect your DocsFold account to Zapier and click Continue.
In the Template ID field, select the template you want to use. In this case, we'll use the Certificate #1 template we created earlier.
The Output Format default is to return a URL to the generated PDF. If you want to return the PDF file itself in base64 format, select file.
In the Overrides section, we'll add 3 entries, one for each template property (organization, name and reason), which we will link to the Organization, Name, and Reason columns we have in our sample sheet.
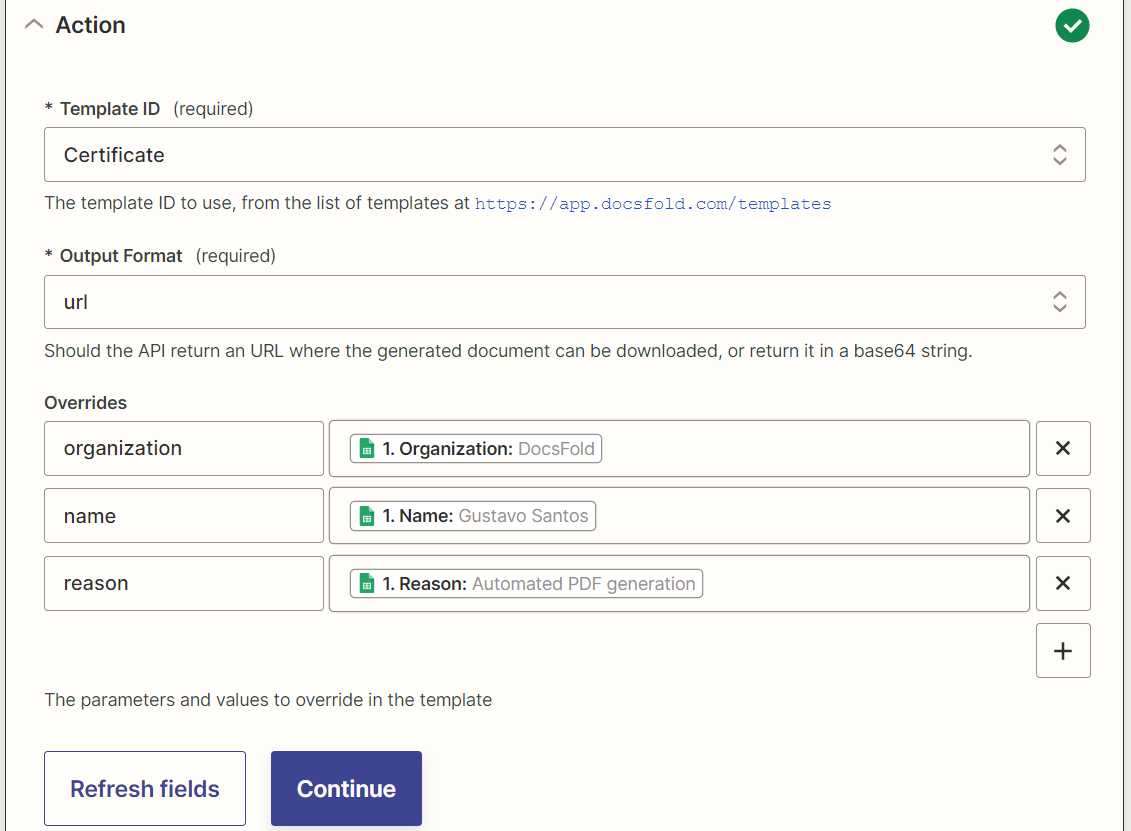
Finally, click Continue
Test your Zap and publish it
Before you start using your Zap, it's important to test it to make sure everything is working correctly.
To do this, click Test Action and wait for it to finish. Once finished, you should have a list of fields, one of which will be pdf_url. You can use this URL to view or download the PDF.
Depending of your needs, you can setup another action to save the PDF, send it by email, or upload it to Google Drive.
Congratulations, you've successfully set up Zapier and DocsFold to create PDFs automatically!
Conclusion
In conclusion, Zapier and DocsFold are powerful tools that can help you automate PDF creation and save you time and effort.
By following our step-by-step guide, you'll be able to set up the integration between Zapier and DocsFold and start generating PDFs in no time.
We hope you found this guide helpful, and if you have any questions or comments, feel free to leave them below. We'll be happy to assist you in any way we can.
Once you've set up the PDF generation process, you can also use Zapier to automate other tasks, such as sending emails or updating your CRM.
By automating multiple tasks, you can streamline your workflow and save even more time and effort.